Bundle Dye Tutorial
Bundle dye in your kitchen.
Bundle dyeing is a great way to experiment with natural dyeing, and perfect for the beginner dyer. This dyeing technique is quite easy and family friendly with adult supervision.
Before getting into the technique, an overview of both fibers and dyestuffs is important to getting successful results each time.
Fibers play a very important role in natural dyeing. Every fabric will take dye differently, or not at all. Natural dyes need natural fibers. The most common natural fibers include cotton, linen, silk and wool. Cotton and linen are cellulose fibers, meaning they are made from plants. Silk and wool are protein fibers, meaning they come from animals.
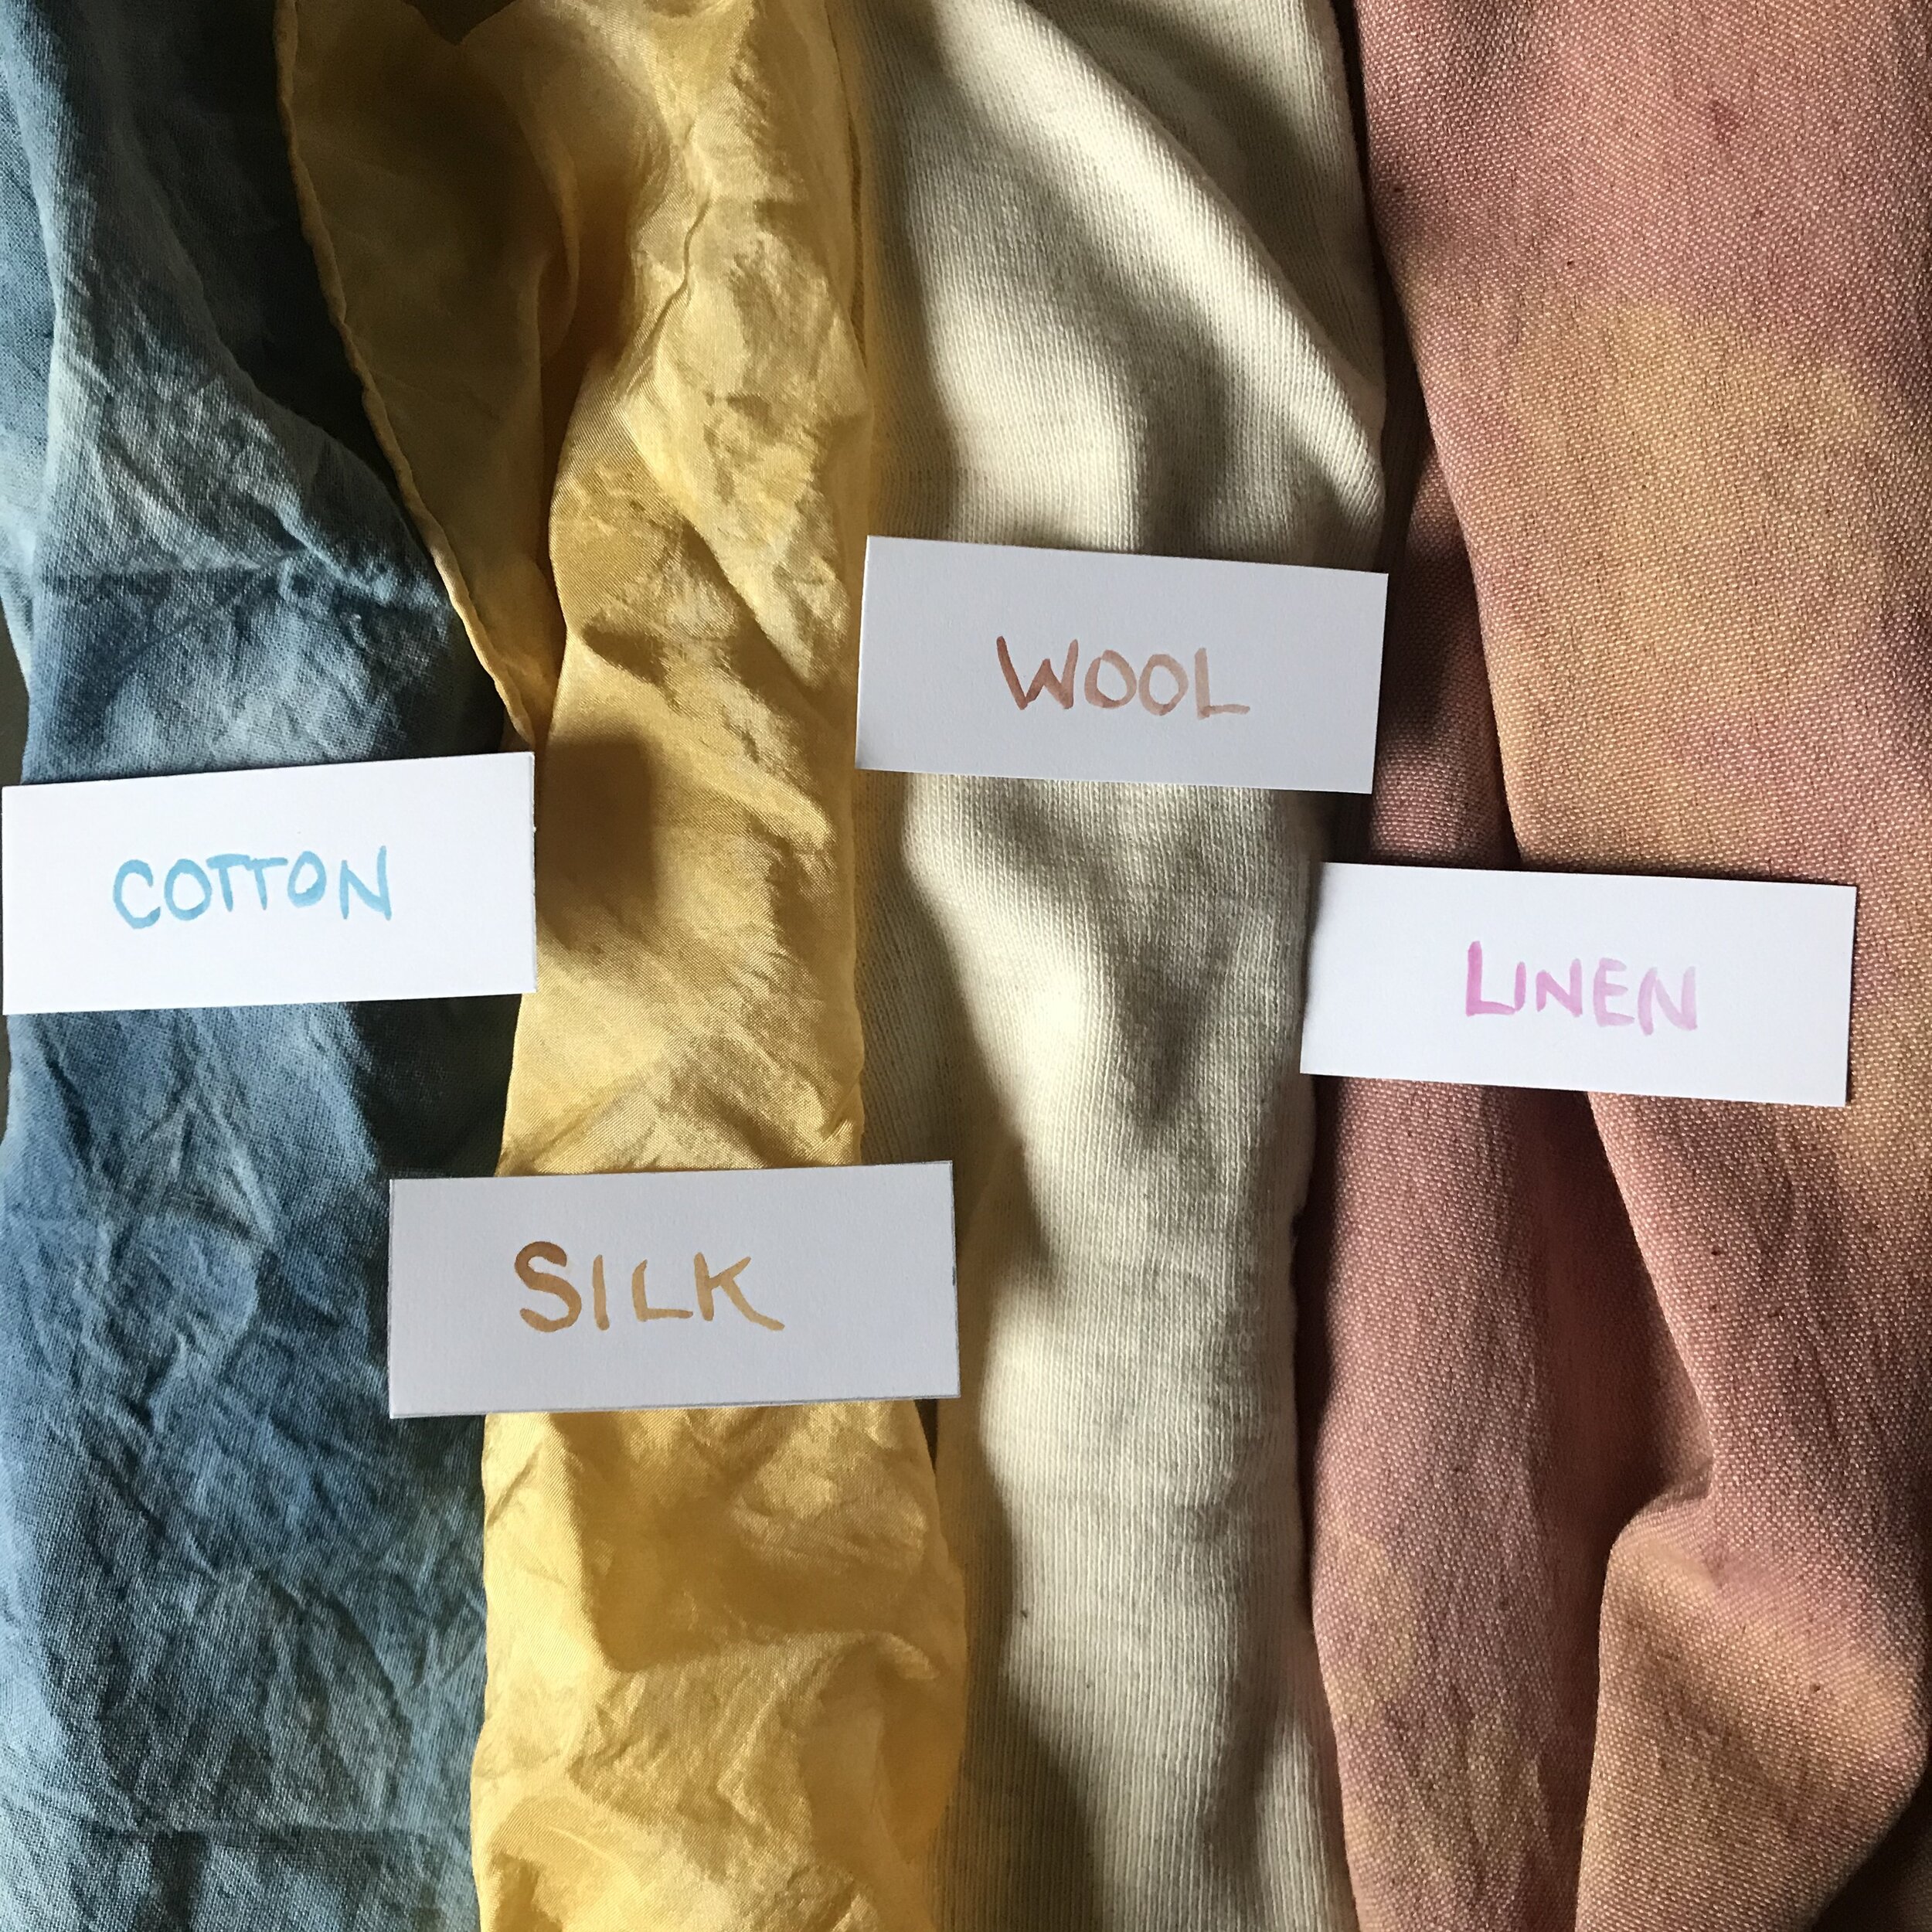
Protein fibers tend to accept natural dye better then cellulose fibers, but both will work. I would not advise using wool for bundle dyeing. The steaming process involved may shrink the wool. Synthetic fibers will not work with natural dyes at all.
Silk is the preferred fiber for bundle dyeing as the colors will be bright and bold. Cotton fiber will work just as well, though the colors may be a bit more muted. This can be just as beautiful. Since this is a kitchen safe tutorial, no mordant is needed.
(A mordant is an additive to the fiber to make the color adhere better to the fabric. It comes from the French word mordre, meaning to bite. As it makes the color “bite” into the fabric. Some mordants will alter the color of the plants used, and some mordants are better for certain fibers. A kitchen safe mordant is using soy milk on cellulose fibers. Soy is a protein, and by soaking cellulose fibers in a protein solution, it makes the material more like a protein fiber. For a good tutorial on mordanting with soy milk, go HERE).
Cotton and silk are the most common materials for bundle dyeing. Try second hand shops for silk scarves and hankies, or give an old stained shirt a new life of color with plants. Using white or off white textiles is always best for natural dyes. You’ll have better luck dyeing lighter weight fabrics, save the sweatshirts for tie dye.
Most plants will leave a color on fiber. (Ever get a beet or coffee stain on your shirt?) Some plants will leave bold color.
Red rose petals or pea flowers are bold, and some colors are lighter like onion skins. Not every plant will leave the color expected. A red rose petal for example might leave a more purple stain then a red one.

I like to save any flowers that are ever given to me. Roses from Valentine’s Day and a birthday bouquet, with the flower parts removed and frozen in a zip seal bag. I will also forage for plants as well. (Foraging rule, only take 1/3 of the plants, and leave the rest for the bees). Goldenrod makes beautiful yellows, and I keeps well in the freezer. Kitchen scraps become part of my dye garden as well. Onion skins, red cabbage, carrot, shredded beets, and turmeric will all give nice colors.
One of the most famous plant dyes is indigo. Indigo is not used for bundle dyeing as the process of extracting indigo color is much different from most plants. You can learn more about indigo dyeing, with instructions for your own vat from this zine HERE.
Certain plants are more “fast” than others. Meaning, if the color is not fast, it may not stay on the fabric after a few washings or fade if left in the sun. A plant that is fast might be osage orange bark, a plant that’s not as fast is turmeric. Both plants dye shades of yellow I love seeing how the color changes over time. If something fades, dye it again! The best part is just to experiment. Have some spinach leaves? Try it? You never know what you’ll get.
You can also use prepared dry dye materials. Such as Osage orange bark, crushed madder root and logwood. Cochineal makes an intense pink, just make sure its powdered first.

Once you have gathered your dye materials and textiles, you will need just a few more things. Some white vinegar, a pot, a colander, some string (I like the kind you wrap a turkey up with) and a pair of scissors. All things you have in your kitchen already. I recommend getting a pot and colander that you can dedicate to only using for dyeing. For this tutorial is is not necessary, as this process is food safe.
If you are dyeing new fabric it will need to be washed first. There may be chemicals on the cotton fibers that will keep the plant color from best adhering to your cloth.
You’ll need:
-Pot (stock pots work well)
-Colander
-Fabric for dyeing, maybe an old T-shirt
-White vinegar
-Dye materials. This can be anything from dry dye materials, fresh and frozen flowers, weeds, and food scraps.
- string
- scissors
1. Gather all your materials and make sure you are working on a surface that’s ok to get messy.
2. Dampen the textile you will dye. Just slightly, you don’t want a dripping cloth, but you do want to make sure that all the fibers are wet. No dry spots.

3. Lay your fabric out flat on the surface.
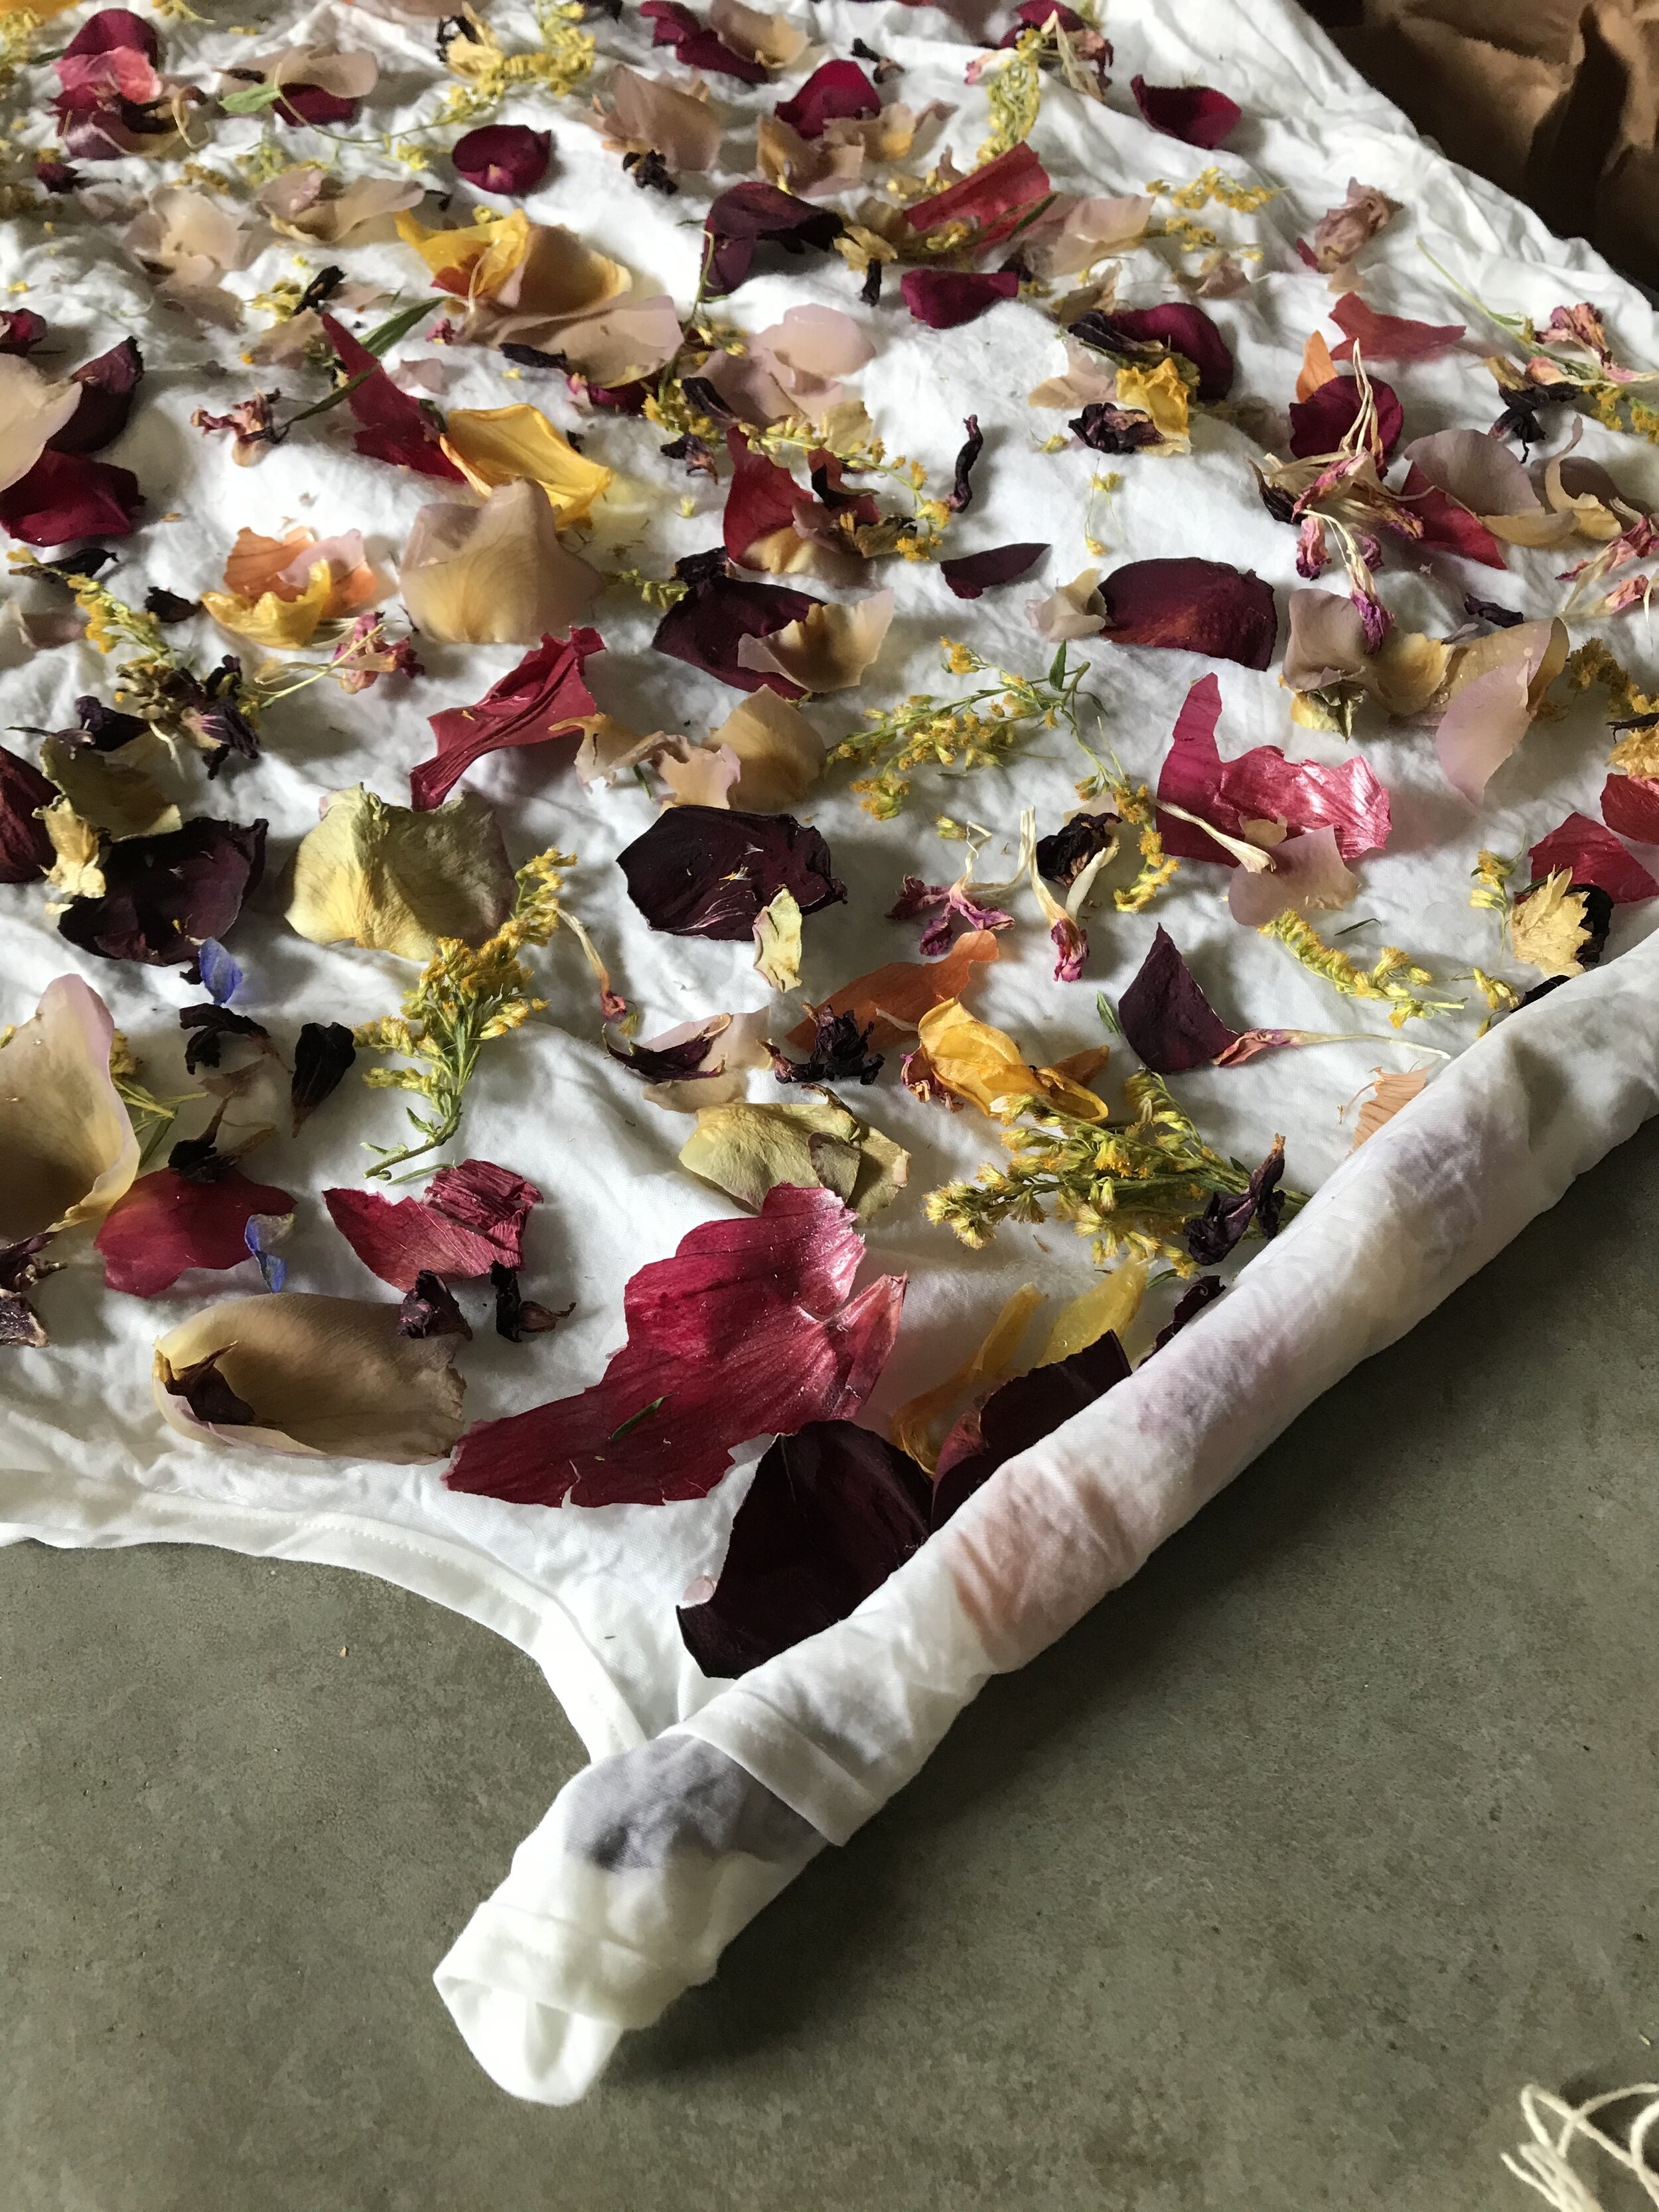
4. Start placing the plants and dye stuffs all over your fabric.
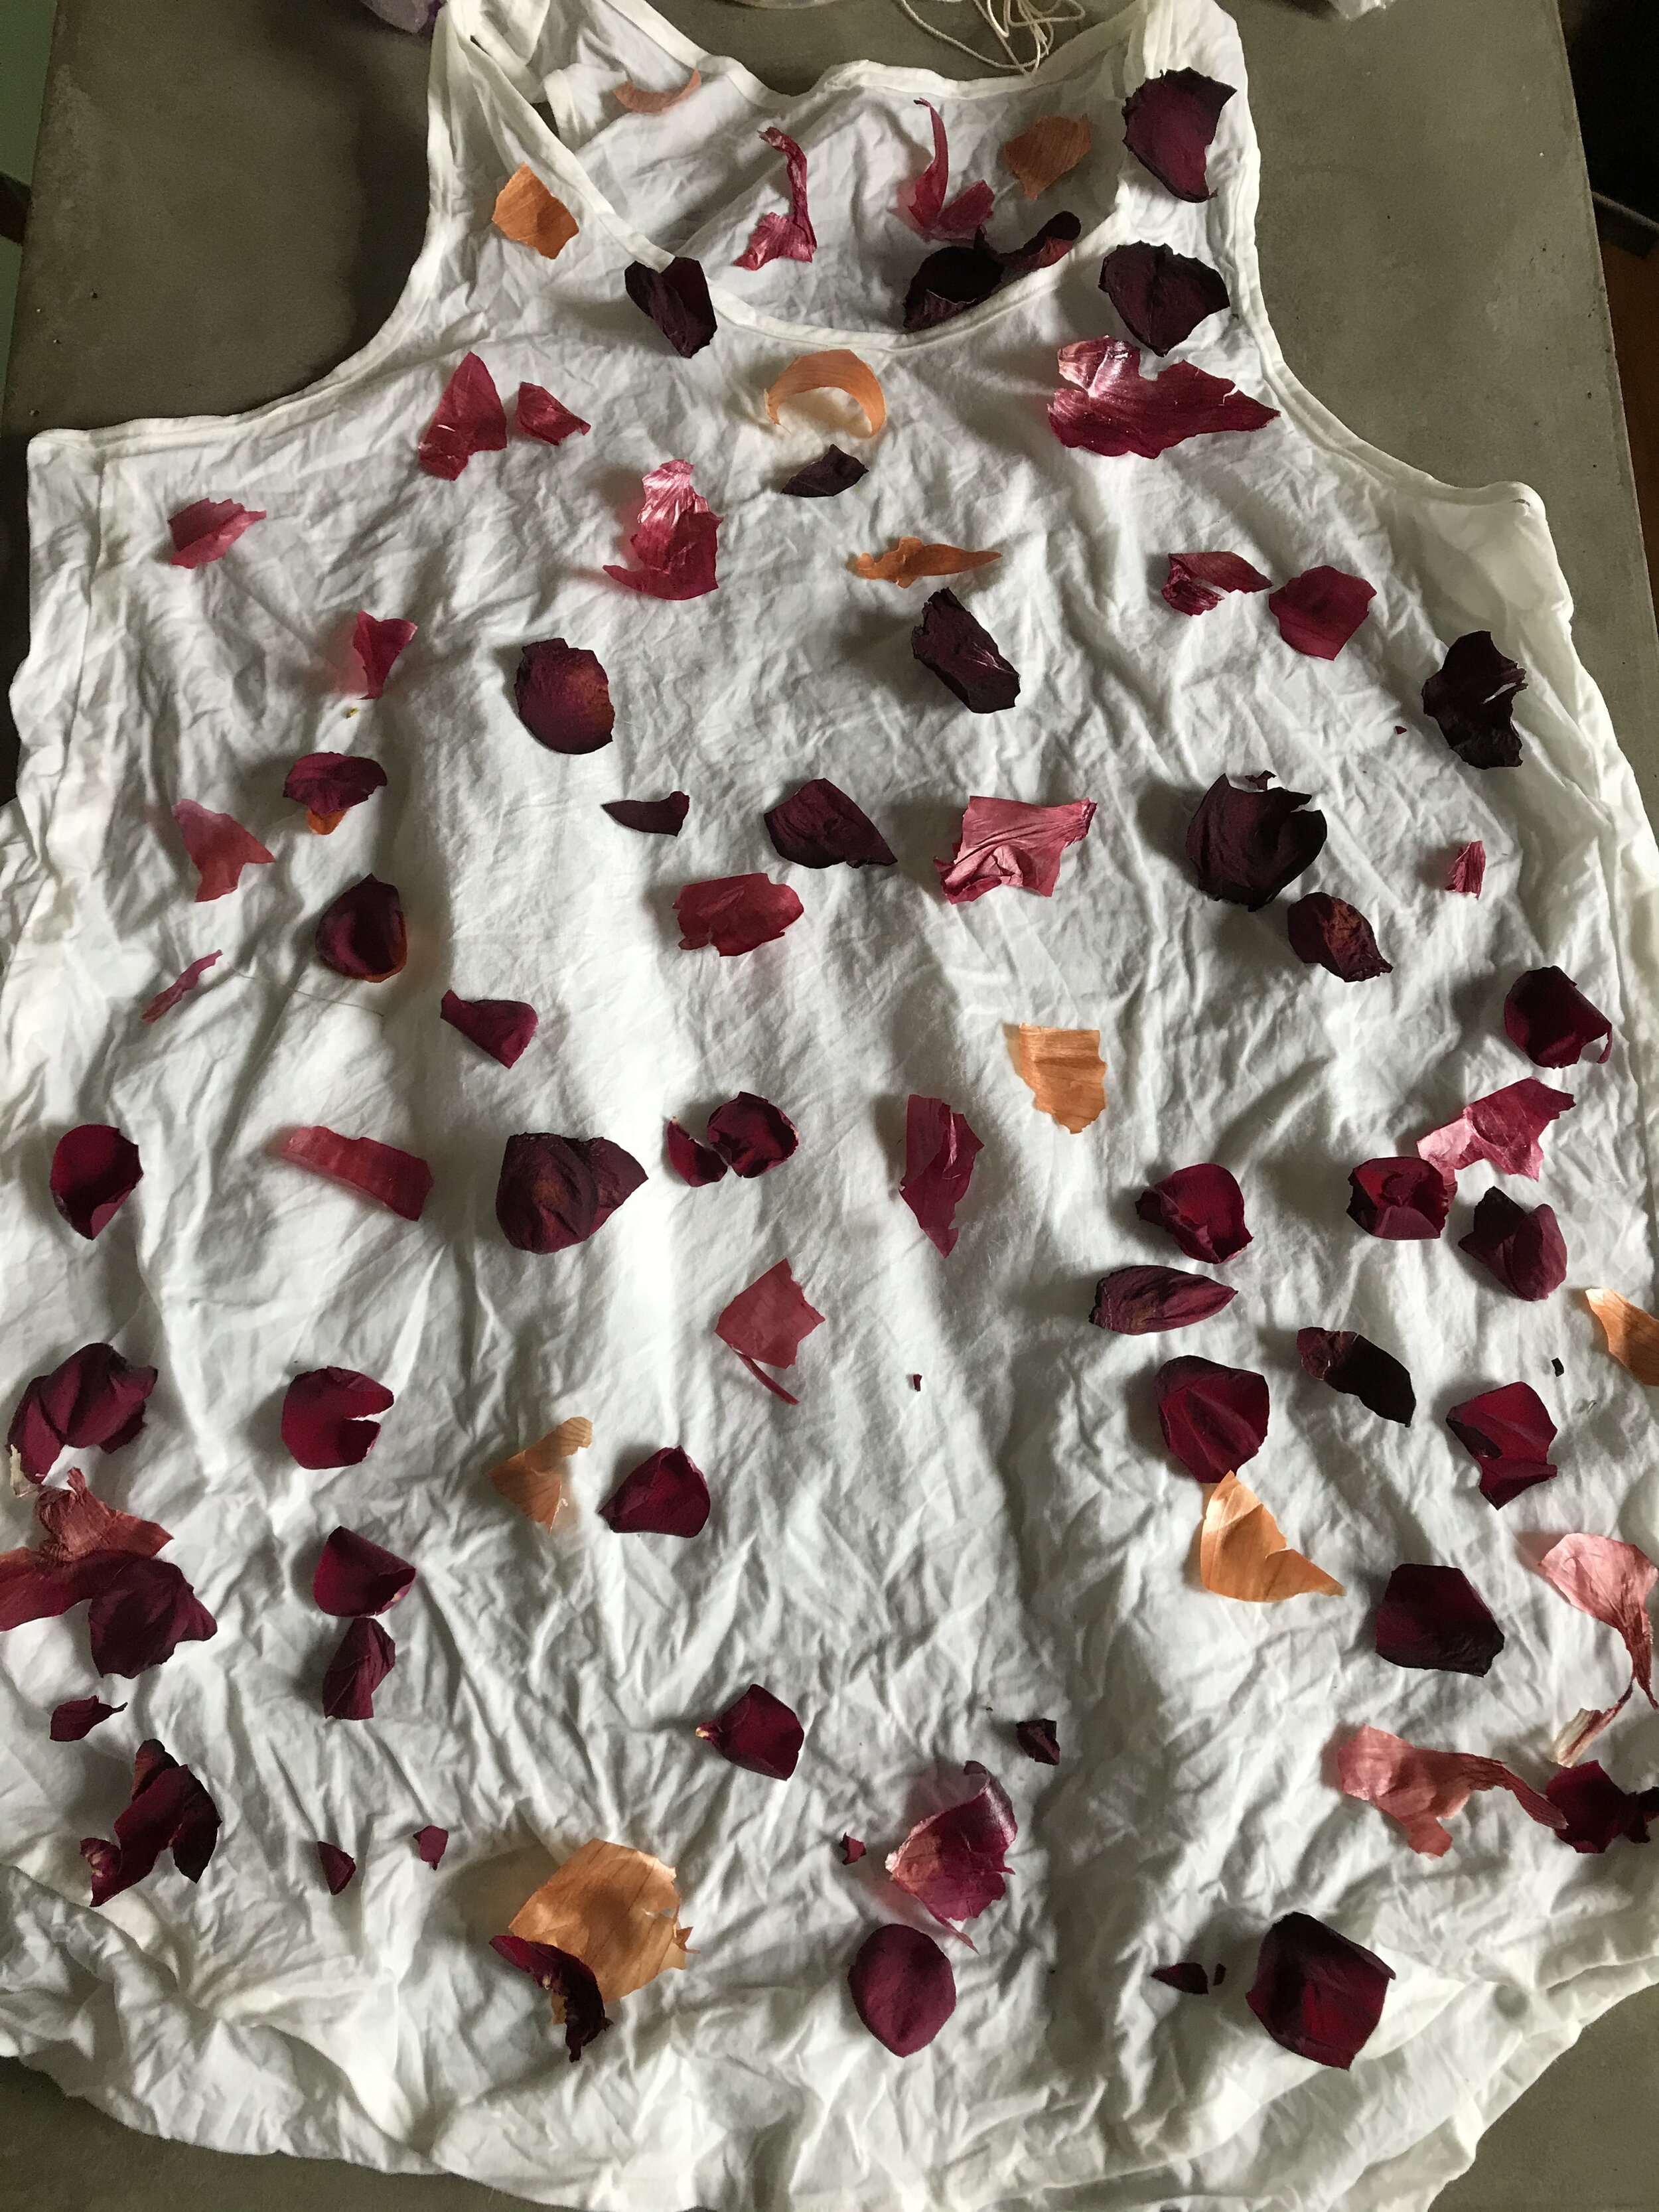
5. Keep going. You can use a lot or a little dye stuffs. If you want to do a little, and decide you want more color, then do the process again. This process can be repeated indefinitely.

I like to randomly place about natural dyestuffs all over the whole of whatever I'm dyeing. With some practice there is a limited amount of control you can get with the dye. But the randomness is what makes this dye process so fun.
6. Once you have finished covering your textile with dyestuff, it needs to be rolled up tightly. If the shape is odd, you can fold the sides in then roll. How ever it rolls up in fine, as long as the dyestuff gets rolled up into the fabric and is rolled as tight as possible.

7. Once its rolled up you’ll need to wrap it in string. Really wrap it, and make the string as tight as possible. You might even start to see the plants dyeing the fabric at this point! You now have a bundle.

8. Knot off the end of the sting once you are done wrapping so it doesn’t come undone.

9. Fill your pot 1/2 way full with water and place on the stove to boil. Place the colander on top of the pot as if you’re making a little steamer. The steam and heat is what will extract the color from your plants.
10. Drizzle white vinegar over your bundle. I like to do this when the bundle is in the colander on top of the water that’s on to boil (but before its actually steaming, so you wont burn yourself). The extra vinegar in the steam will also help set the color. Make sure the entire bundle has a drizzle of vinegar.

11. Once the water starts to boil you’ll steam your bundle for an hour. Be very careful, the steam is really hot and can burn you. Every 15 or 20 minutes turn the bundle so the steam gets to every side. For your safety use tongs for this.
12. If the bundle starts to dry out, drizzle with a little more vinegar. Keep an eye on your water level too. Make sure there is alway water in your pot.
13. Do no leave an open flame unattended. Keep an eye on your bundle the whole time its steaming.
14. Once you’re done steaming, turn off the flame and let your bundle rest for at least an hour or two. The more time you can let your bundle rest, the more intense your colors will be. You can leave it over night too.
15. Time to undo the bundle. Carefully snip the string near the knot, being careful to not cut your fabric and remove the string.

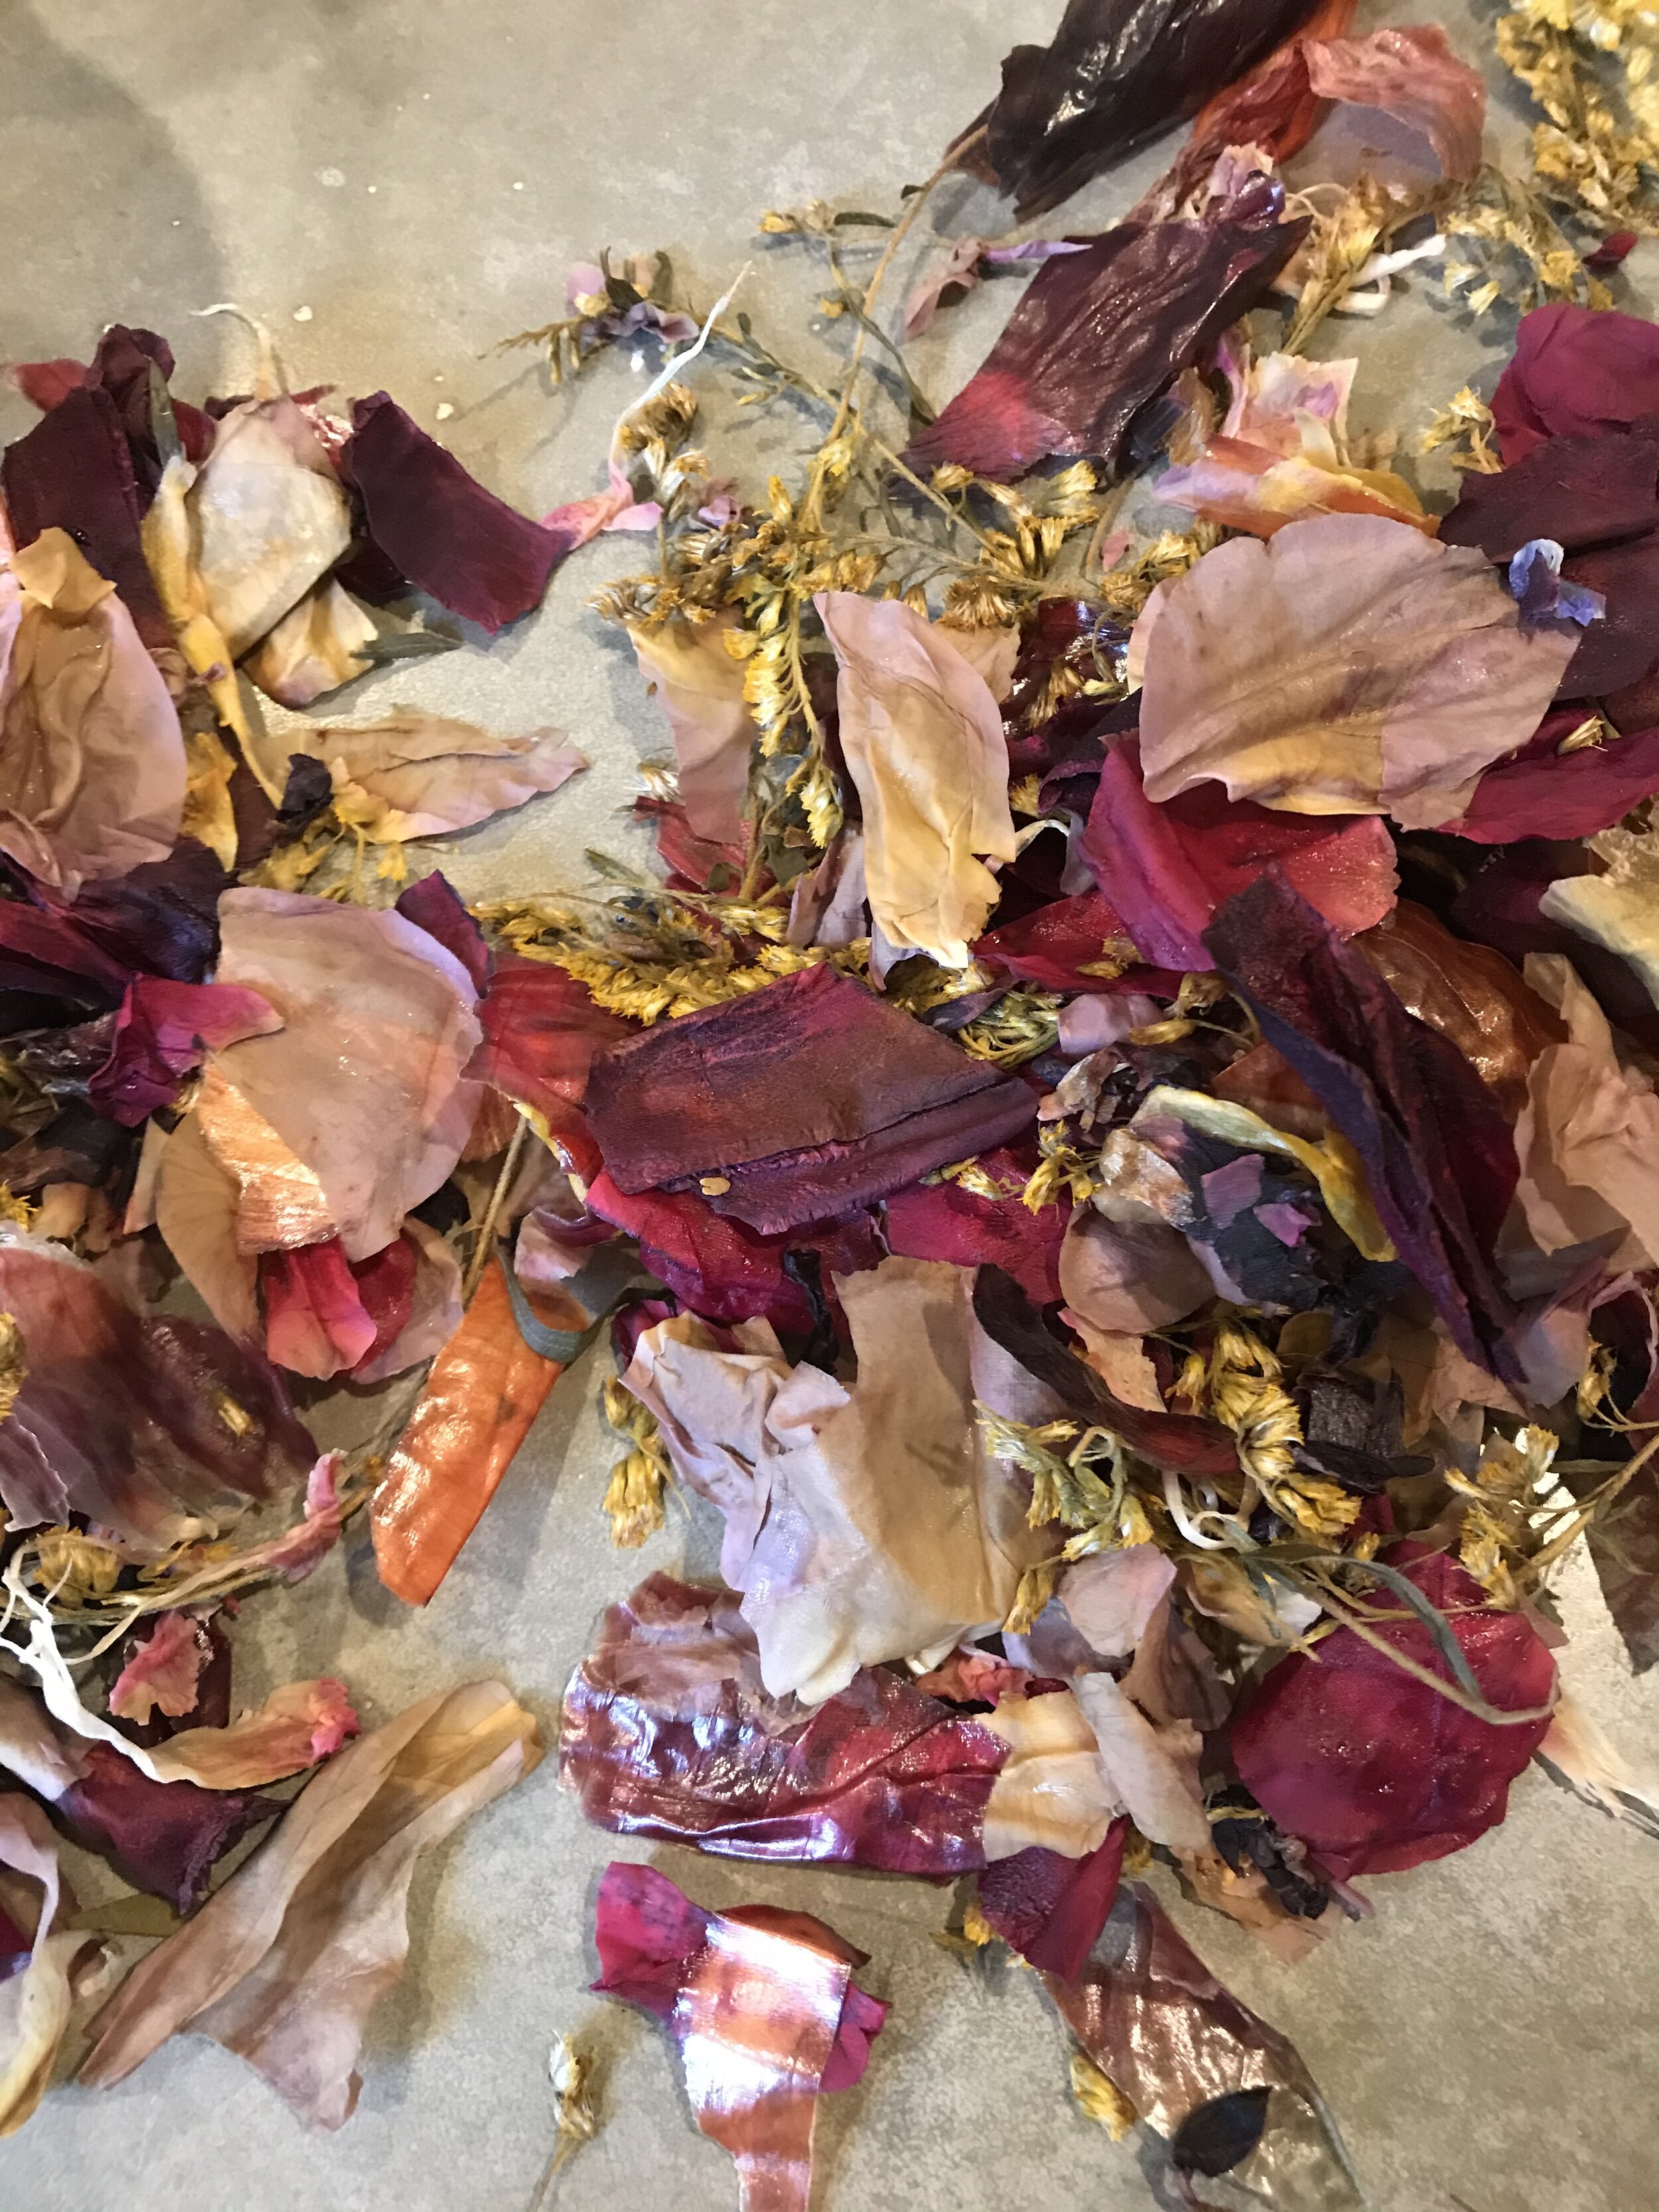
16. Place your bundle on a surface that’s ok to get messy and start unrolling. You’ll see that the plant material sticks to both sides.

17. WOW! What beautiful colors! Remove all the dye stuff from the fabric and toss in the compost. Gently rinse in cold water.
18. Hang to dry. You’ll notice that once the fabric dries the color will be 2-3 shades lighter. If you want to add more color, do it again!

Caring for your naturally dyed fabrics - Never wash in hot water. Cold water only, as hot water will make your color fade quicker. Try not to wash as often as you normally would. Especially accessories. You might never have to wash a silk scarf. If you do have to wash something, spot cleaning is a good option and always use a neutral ph soap.
Experiment and have fun! Plant color is magic. If you like this post sign up for my mailing list, or leave your contact info in the comments to learn more about Four Rabbit dyeing workshops.
You can shop Bundle Dye Kit HERE