Onion Dye Tutorial
Onion Skin Dye Tutorial
Check out the Onion Dye Infographic HERE

Red and Yellow Onion Skins.
Hey! Stop throwing away all those food scraps! Many plants, including the ones we eat, make really beautiful textile dyes. Onions happen to be really good at dyeing fabric, and make your house smell good while doing so.
Yellow onion skins will create browns and yellows depending on how hard your water is, and the kind of fiber you’re dyeing. Red onions make a greenish dye. You can mix the skins together and experiment as well.
*Red onion skins are very sensitive to pH and to certain mineral salts, such as aluminum found in most deodorants. (actually most plants dyes are sensitive to aluminum). If you are dyeing an old t-shirt with plants, and specifically red onion skins, the armpits of the shirt will dye darker then the rest of the material. If the shirt is new, and it is sweated in, the pH from the body sweat may alter the color as well. I prefer to use red onion skins to dye non clothing items. Again, experiment and see what happens. It’s all part of the fun.
To make the dye, you’ll essentially be making onion skin soup or stock. The ratio of dye materials, in this case onion skins, to amount of fabric will determine how saturated the color will be. More onion skins, the darker the color. Though the amount of dyestuff is only one factor in how much color you can get from plants. How much extraction time also will yield less or more color. Then there is nature herself, and some plants will dye better than others, each crop is totally different.
Keeping good dye notes will help you be able to get similar results every time. Because we are working with natural materials, every crop, every region, the soil richness that year, will all play a big part in what the color yield is. One of my favorite aspects of natural dyeing is the unpredictability of each dye pot.
All fibers will dye differently as well. Silks and woolen yarns tend to dye with more intensity than cottons and linens. Neither fibers are better or worse, just different. I almost always dye cottons and love the colors I get. I talk about fibers in my last tutorial, Bundle Dyeing, you can read about it HERE.
Because I dye primarily with cotton fibers, i’ll be dyeing a cotton muslin shirt for this tutorial.
Remember to pre wash any new fabrics or clothing before dyeing. New fabrics usually have a wax coating that needs to be washed off to best get your natural color to bond. In the natural dye world, this is called scouring. Throwing that t-shirt in the wash before dyeing will do just fine.
Every time I take an onion out to cook, I peel the papery skins off and set aside. I save them in a bag in the freezer which will ensure having skins that aren’t moldy for dyeing. After I’ve collected about 12 or more skins, i’ll have enough to dye a t-shirt. Again, if you collect more skins, you can make a stronger dye liquid.
Now that you have collected enough skins, you can start making your dye bath. Having a dye pot dedicated to only for dyeing, and never using for cooking is best. Though this tutorial is kitchen safe, I highly recommend a dye only pot. You can get an inexpensive stainless steel pot from online sellers on eBay or craigslist, or from garage sales.

Onion Skins Placed in the Dye Pot
Place your onion skins in your pot and fill your stock pot up with water 3/4 of the way full.

Onion Skins and Water on the Stove Top
Bring the water to just before boiling, then turn off the heat.. The heat is helping to extract the color from the skins.

Heating the Onion Skins
After the dye has cooled down, heat the dye stuffs again and let cool. Repeat this process 3 or 4 times. Let the dye cool and steep over night.

Dye Extraction After the First Heating
Heat and cool the dye one last time.

Dye Extraction After the Final Heating
While your dye is heating and cooling for the final time, soak your fabrics to dye in a bowl of water. Ideally your fabrics will soak for 45 minutes minimum. The wet fibers will more evenly distribute the dye to your textiles to ensure and even color. You can also bind your fabrics in different shibori folds to get dyed patterns in your fabrics. This is seen most commonly with indigo dyed Japanese textiles.
Once the dye is cool, remove the skins. You can either use a slotted or mesh spoon or colander used only for dye.

Removing the Onion Skins. Save for a Second Dye or Compost
You can save your skins and add them to fresh onion skins for a new dye pot (there is still color in there!) or compost them.
Heat the strained dye to right before boiling. Turn the heat off.

Strained Onion Dye. Look At That Color!
Take your textiles out from the water and wring as much water you can out of them. Give them a shake to un-wrinkle a bit and submerge in the dye. Use dye only tongs or a spoon to do this since the dye is HOT.

Wringing Out the Water From the Soaking Wet Shirt
Some of the water has evaporated during the steeping process. Add hot water to your dye pot to make sure there is enough liquid to cover your fabrics.

Adding Enough Water to Cover The Shirt
Give a little stir to make sure the dye is getting to every surface of your fabric. Be careful, the dye liquid is HOT.
Let your dye sit for at least an hour or two.
This is the color after only an hour!

The Color of the Shirt After Only One Hour in the Dye
I like to let my fabrics dye overnight/ 24 hours. This will give me the most saturated color.

After Soaking for 24 Hours
Once you are happy with the color you have achieved, remove your fabrics and squeeze the excess dye out back into the dye pot. There is still plenty of color left in the pot and you can use this to dye more fabrics a lighter shade of yellow.
Rinse your textiles in cold water until it runs clear. Wring out water and hang dry. The fabrics will dry 2-3 shades lighter then when wet.

Wringing out the Dyed Fabrics
To care for your naturally dyed fabrics, wash in cold water only and use a pH neutral soap. If you find that your shirt is fading, just re dye it!

The Shirts Wet, Right Out of the Dye Bath
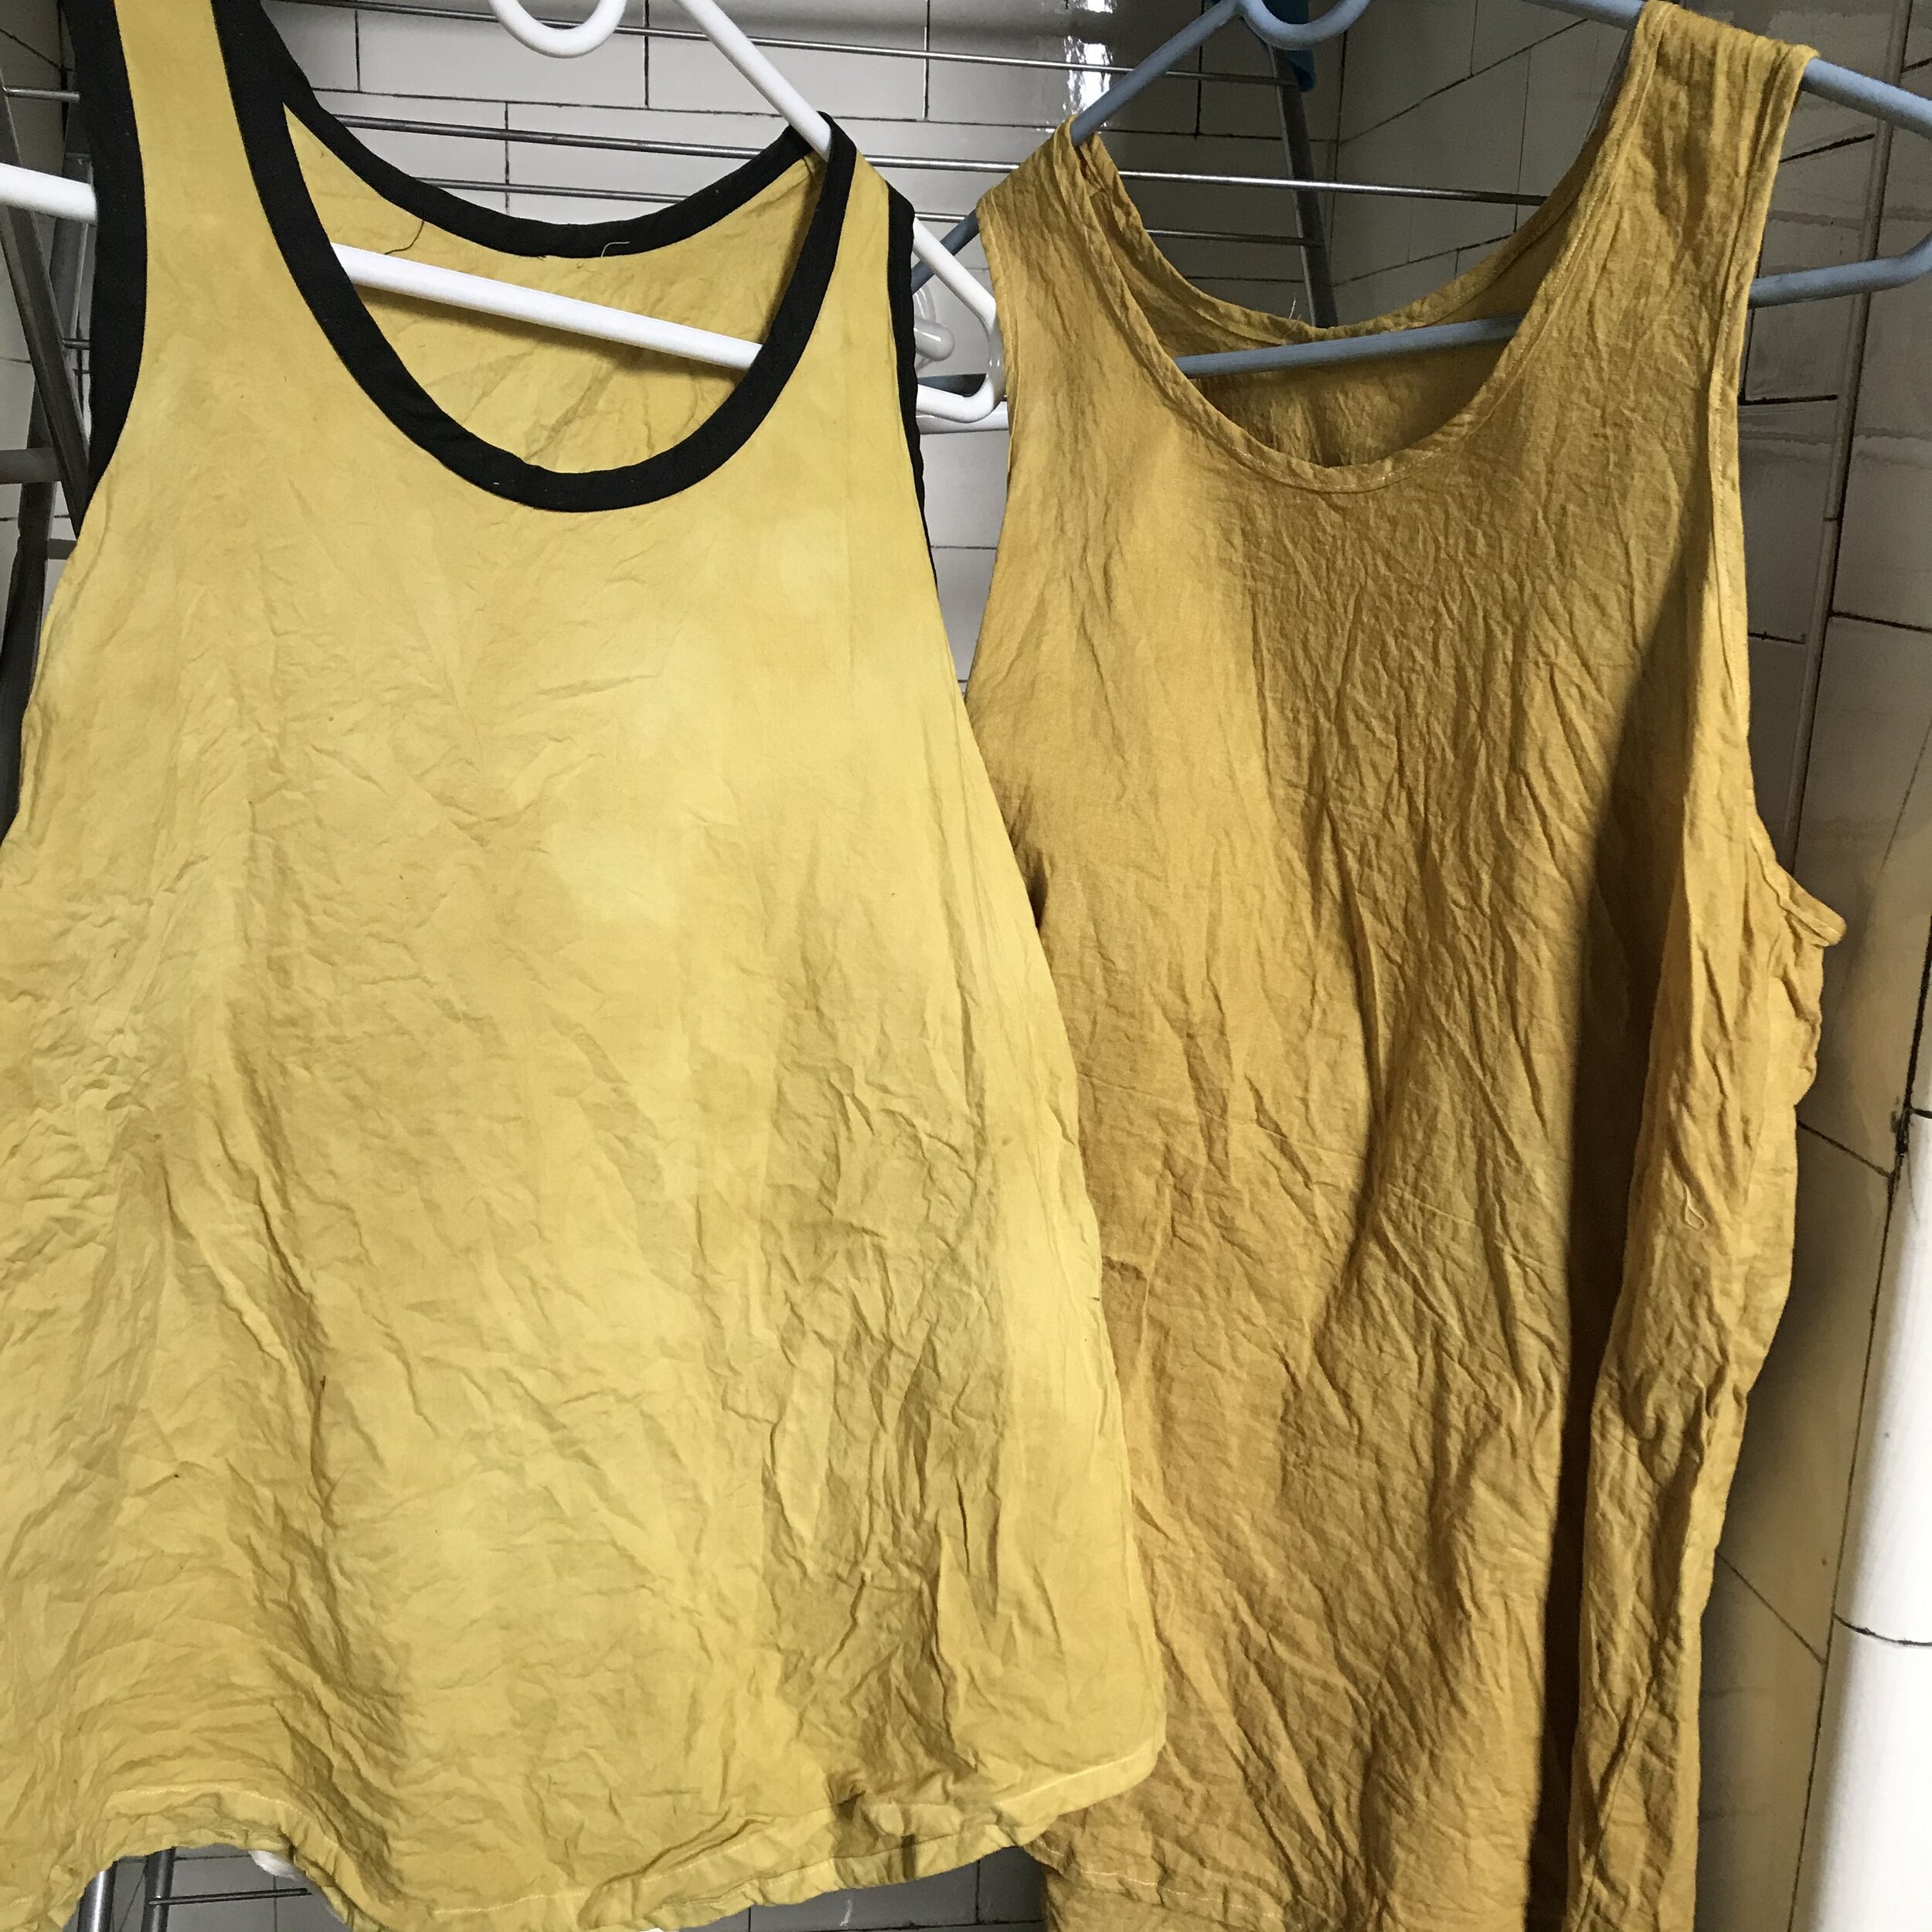
The Shirts Once They Are Dry
Most importantly, have fun and experiment.
If you liked this post, let us know in the comments below or sign up for our newsletter. Shop Four Rabbits naturally dyed clothing HERE.

The Fabric on the Left Dyed Using the Second Bath, The Fabric on the Right Was Dyed in the First Dye Bath. Both Colors Are Beautiful, Just a Lighter Shade from the Second Bath.